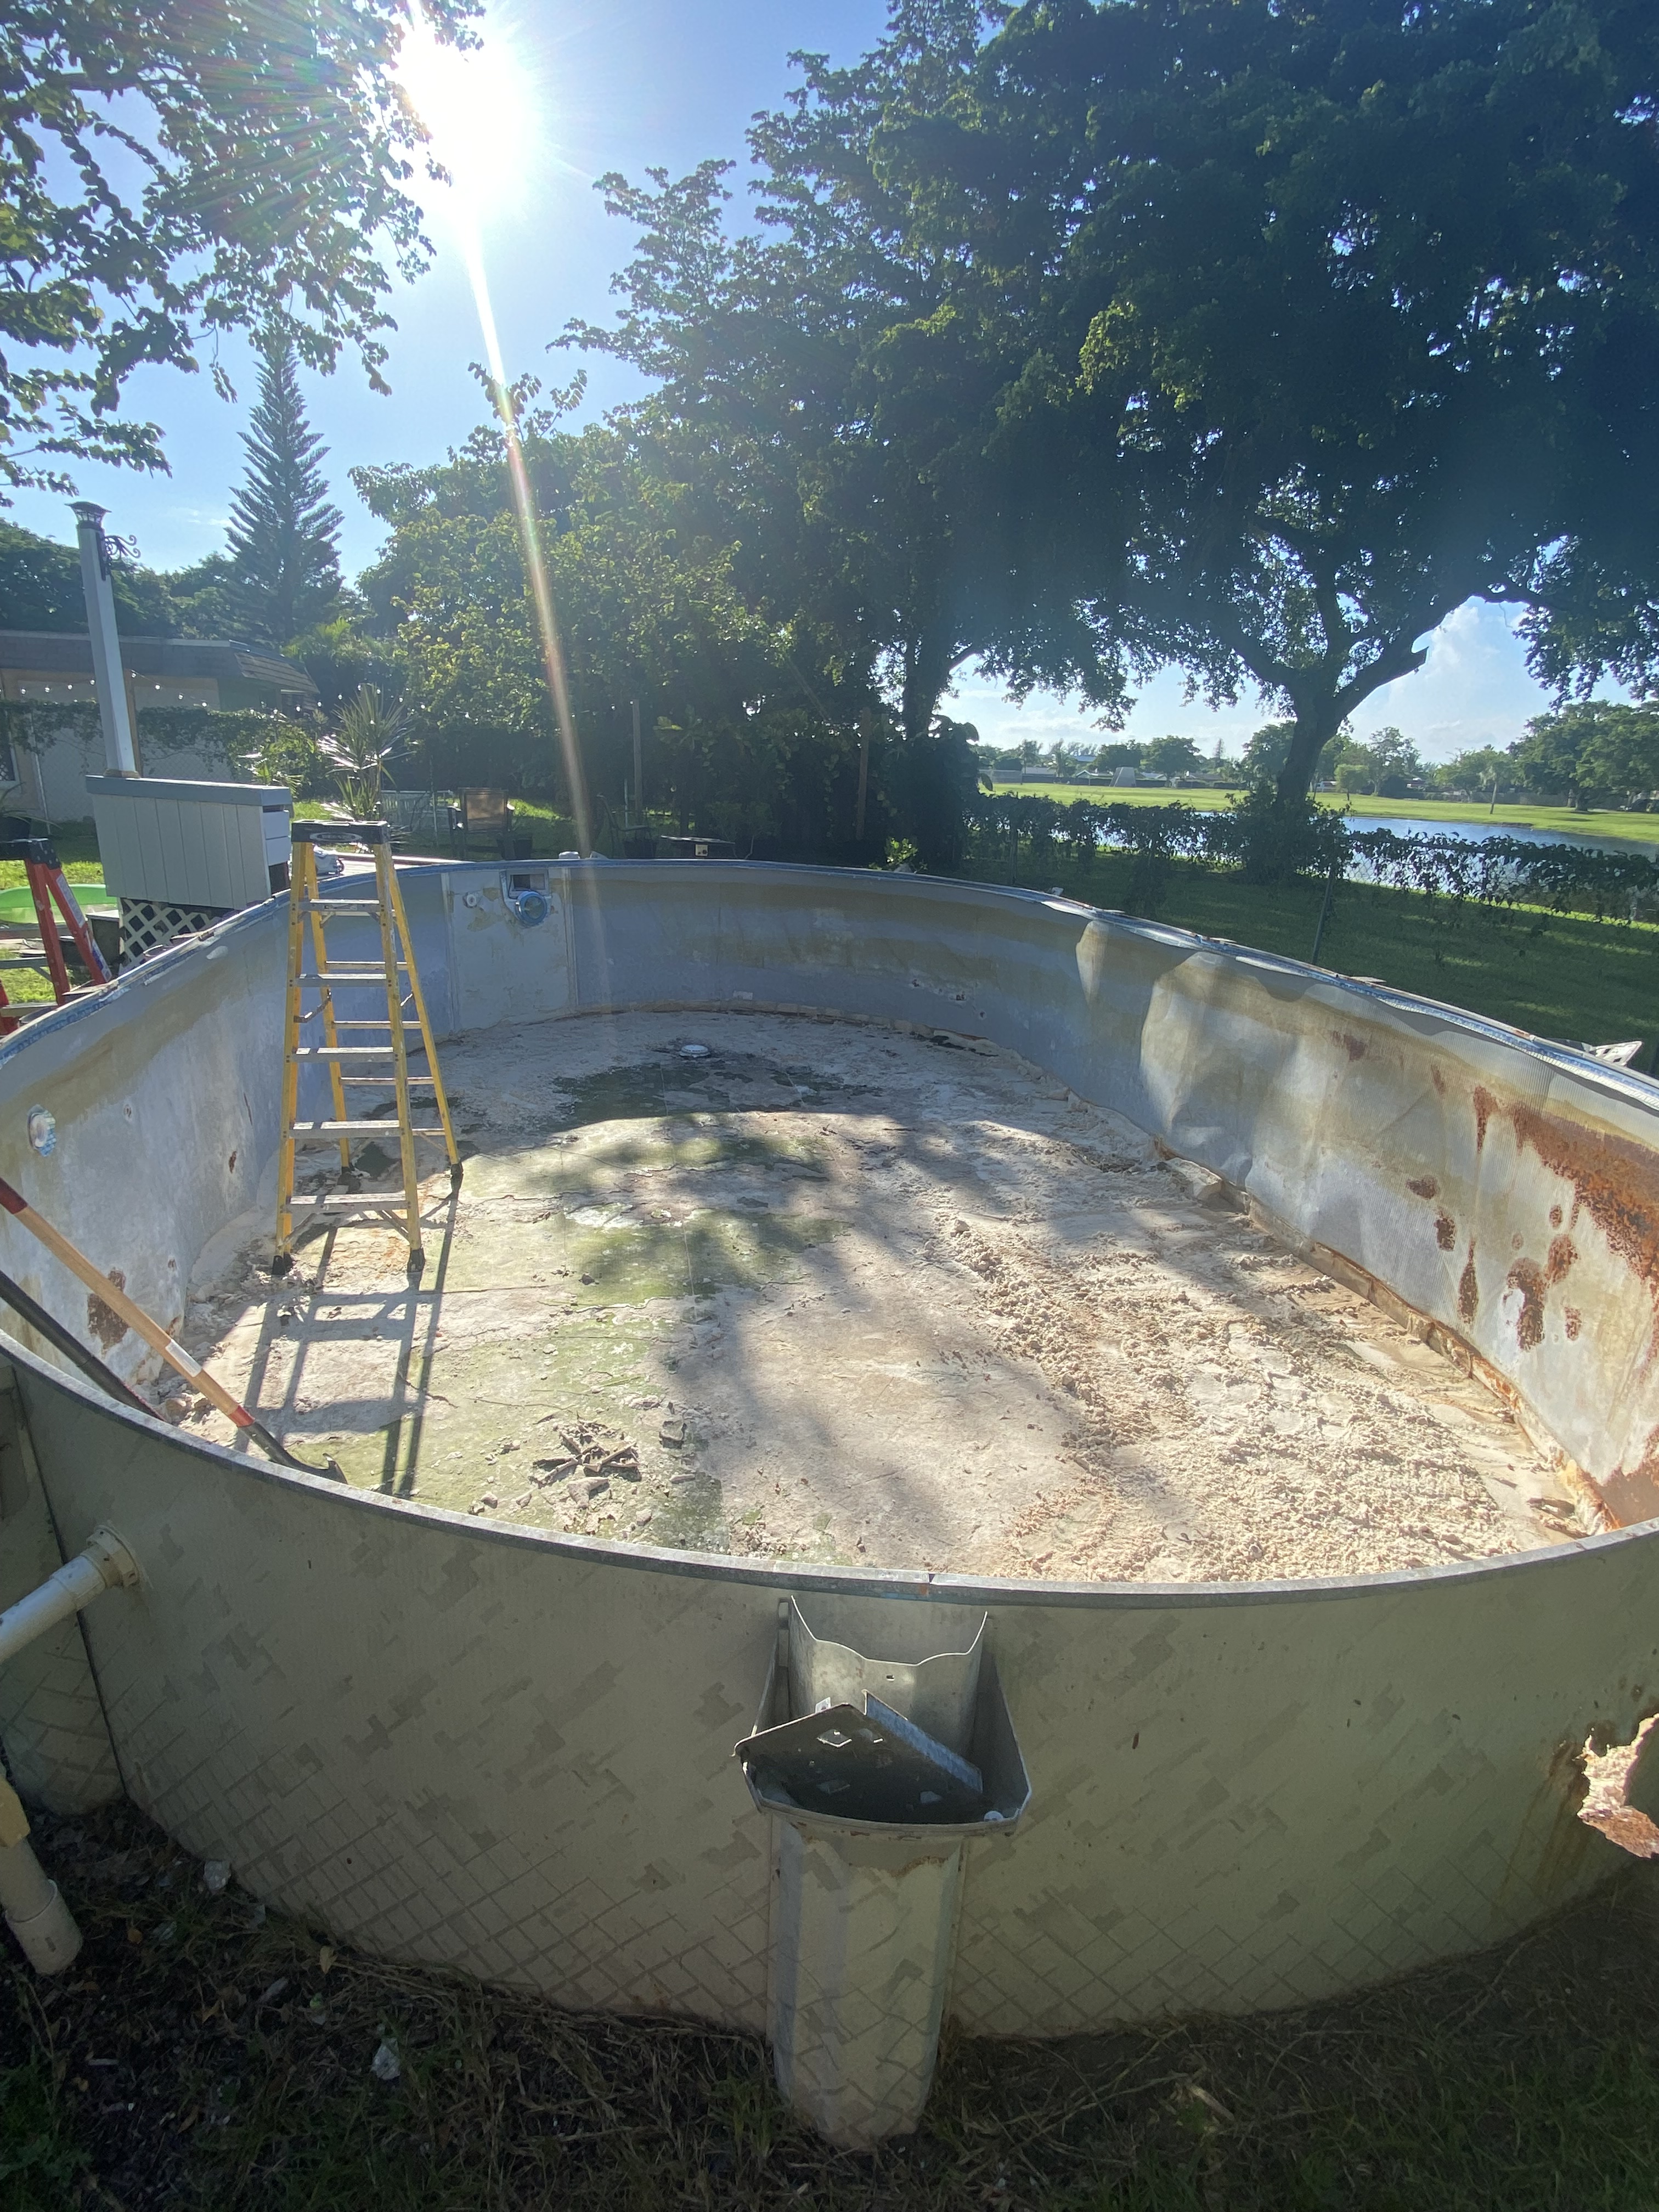
With all of the pool’s guts removed it was time to start research and buying everything that we now needed to replace.

What we had, most secure 
Easiest to Replace 
Easiest to install
We did some research on the liner and found out that it was a unibead style liner, which is supposed to be one of the most secure, but not easiest to install or replace. We measured the pool, and kept coming up with odd measurements that included an extra 1/2″ or 3/4″, but after extensive research and getting familiar with how pool sizes run, we finally felt confident enough to order the liner. The size of our pool limited our options for liner designs with Chris initially only showing me two, neither of which I was totally psyched about. But when he went back to the results, there was a third which I loved and so we ordered it.
I don’t know if it was an option or if he thought about it for the liner, but when it came to ordering the floor liner, wall foam, and cove, we compared prices on Amazon, and thank goodness! We saved at least $200. And then it was a waiting game, as the website for the liner didn’t actually say when to expect delivery.
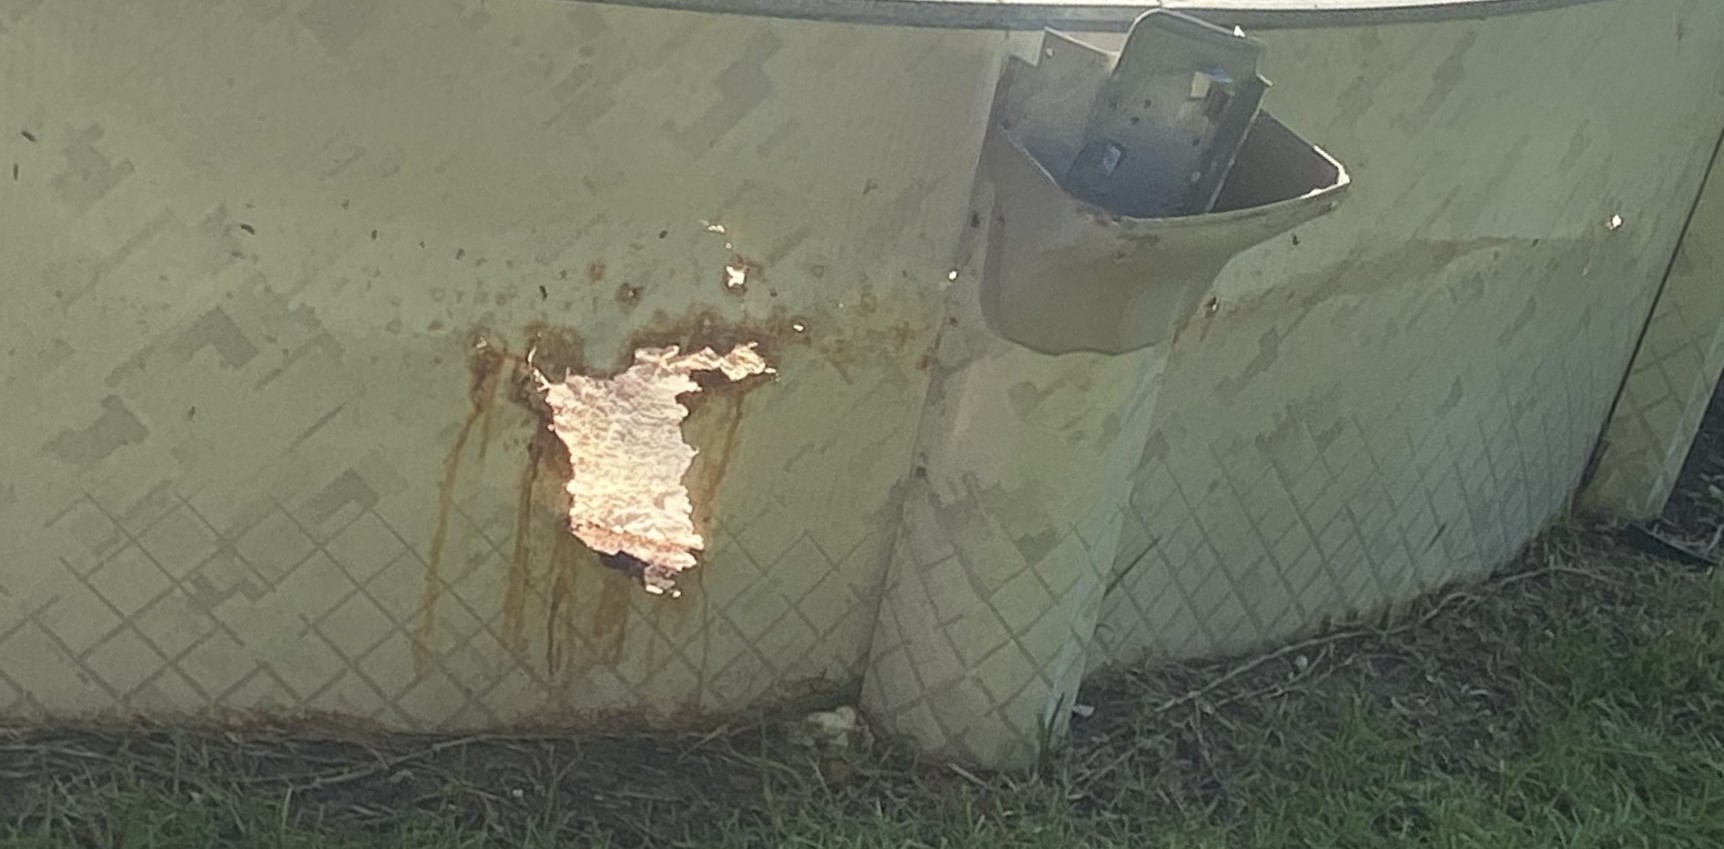
So while we waited for those things, Chris did research on how to address the giant rusted out holes in the side of the walls. He knew we could address the rust itself with a type of spray paint he’d used in the past, but went to YouTube for advice with patching the hole. Eventually he found that he could use sheet metal with pop rivets. Those things we could get local, so we got to work.
Inside’s sprayed 
And the outside
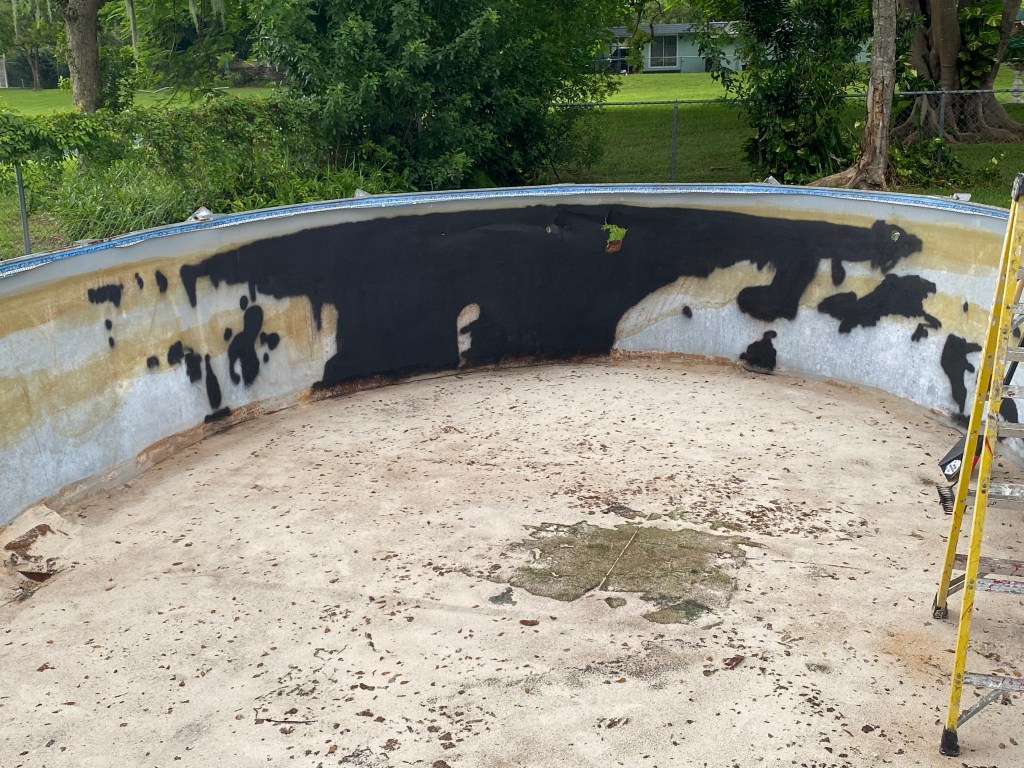
He sprayed the major rusted areas inside and out of the pool with Rust-oleum’s Rust Reformer in effort to stop the rust from getting any worse.
And then it was time to cut sheet metal and grind the edges to take off any sharp edges that could possibly scratch the liner once it was installed. And then we connected the sheetmetal to the side of the pool wall with pop rivets. And let me tell ya, using that pop rivet gun is no joke!
Now for everything else to show up and then the real work begins.
This post may contain affiliate links, meaning I earn a small commission at no cost to you! When you purchase through the links provided, you will be supporting Brittany Bower and helping to bring new content to the site!