Growing up, kitchen towels were not just a tool for drying your hands or the dishes, but also decoration. They were used to convey a theme and make the room seem cheerier, like the strawberries in my grandmother’s kitchen. And since a kitchen can only be decorated in certain ways and places due to fear of getting messy with food, I always liked the idea. And so I have done the same with ours.
But this tended to cause a disagreement between between my husband and I, silly as it is. For me, the current towel in use should reside hanging from the cabinet handles in the kitchen, while my husband likes to keep it out on the counter instead, even after he is done, leaving me to assume that it is dirty, and for him to then question where it is has gone.
But he did have a point – hanging the towels from the cabinet handles blocks the drawers below. So I challenged him to find us an alternative and he has finally delivered, a new type of towel hook that we can keep on the side of the cabinet instead of the front. And they’re super easy to install!
We first questioned how well they would stand up, considering how reasonably priced they are, but after 3 weeks of using the new hooks, I must say I’m impressed. I regularly dry my hands without removing the towels, and they’ve managed just fine.
We have now had our house for 5 years, it’s crazy how fast time flies!
We’ve made a lot of changes in that time, some revising what was here already and some adding our own touches. But this summer has focused on finally cleaning up the projects we have undone, making our yard more visually pleasing and safer for the little ones running around (our friend’s kids) and hopefully, our future furry one.
The previous owners had a small deck for the pool steps, similar to the ones we have now, but on the opposite side of the pool. It served its purpose, but was starting to show its age and wasn’t to our liking, We usually get out to the backyard through the French doors in the living room or from our bedroom – on the opposite end of the house. On top of that, while we we do have grass in our back yard, it didn’t grow between the pool and the house due to a lack of sun when we moved in, so we tracked in mud every time we came back in after being in the pool.
The previous pool steps (picture taken from realtor.com)
So Chris did what he does and started tearing it down. Getting the boards off was the easy part. The hard part was dismantling the concrete blocks that had cement poured in the center and then bolted to the ground. We tried sledgehammers but they were no match – they simply bounced off. We talked about getting a back hoe and burying them or renting a jackhammer to break them apart, but thought it would take days and subsequently several hundreds of dollars. So they had been an eye sore for about 4 of the past 5 years.
Finally, during the hottest summer I can ever remember in Florida, my husband did what he does and searched on Amazon for a solution – a jack hammer for about $200 (a rental is about $80/day). Knowing that it would physically hard work and guessing that he’d only be able to stand the heat for 15 minutes a day, this would be a tremendous savings if it worked out. Our only hesitation with it was knowing that it would not be the same quality as the commercial rental.
The packaging is nice with a case to hold everything and make sure the pieces don’t end up scattered across the shed. But the quality of the jack hammer is even more impressive. It’s obviously physically straining, at 54 pounds bouncing back and forth against cement and concrete, but the blocks just started tumbling off, and it was even quiet enough for him to continue while I worked in my office without my those on the phone complaining about any background noise.
Now that the old pool deck is FINALLY gone, that side of the yard is cleaning up nicely, although still in need of some work. We got rid of the tree as it was effecting the foundation of our house and now that strip has filled in with some nice grass.
Such an improvement!
This post may contain affiliate links, meaning I earn a small commission at no cost to you! When you purchase through the links provided, you will be supporting Brittany Bower and helping to bring new content to the site!
This post may contain affiliate links, meaning I earn a small commission at no cost to you! When you purchase through the links provided, you will be supporting Brittany Bower and helping to bring new content to the site!
If “one picture is worth a thousand words” as expressed by the Advertising Executive, Fred R. Barnard, then you could write a book on the difference that one Ring Light from Amazon has made in the photos for my website!
Just a little background… when I first started my website, BrittanyBowerDesigns.com 2 years ago, my friend Kat’s biggest critique was about the photos. I need more – something to be able to judge the size of the wreath against, more details, and better lighting. Well, at the time, I had done the best I could with had – settings and tools. I used our more professional camera, a Sony A6000 which Chris always was able to take amazing pictures with! Since they weren’t working out as well for me, I figured lighting was probably my biggest challenge since I was shooting inside and he always shoots outside. When I renovated the Craft Room, I installed the brightest lighting I could thinking it would give me the best advantage, and it has in many other ways, but it still wasn’t enough.
Fast-forward some time with Kat learning different marketing strategies and playing with her own business ventures, she discovered the ring light and insisted I buy one. Fast-forward another year and a half after taking time away from my site to focus on planning and executing a wedding, the recovery from it (which is no joke if you do it mostly by yourself and with a bunch of DIY) and other work-related changes and adventures, and I am back at it with the suggested light! And while I usually leave product reviews to my husband, JCBower, the difference is so significant, I had to do my own 😜.
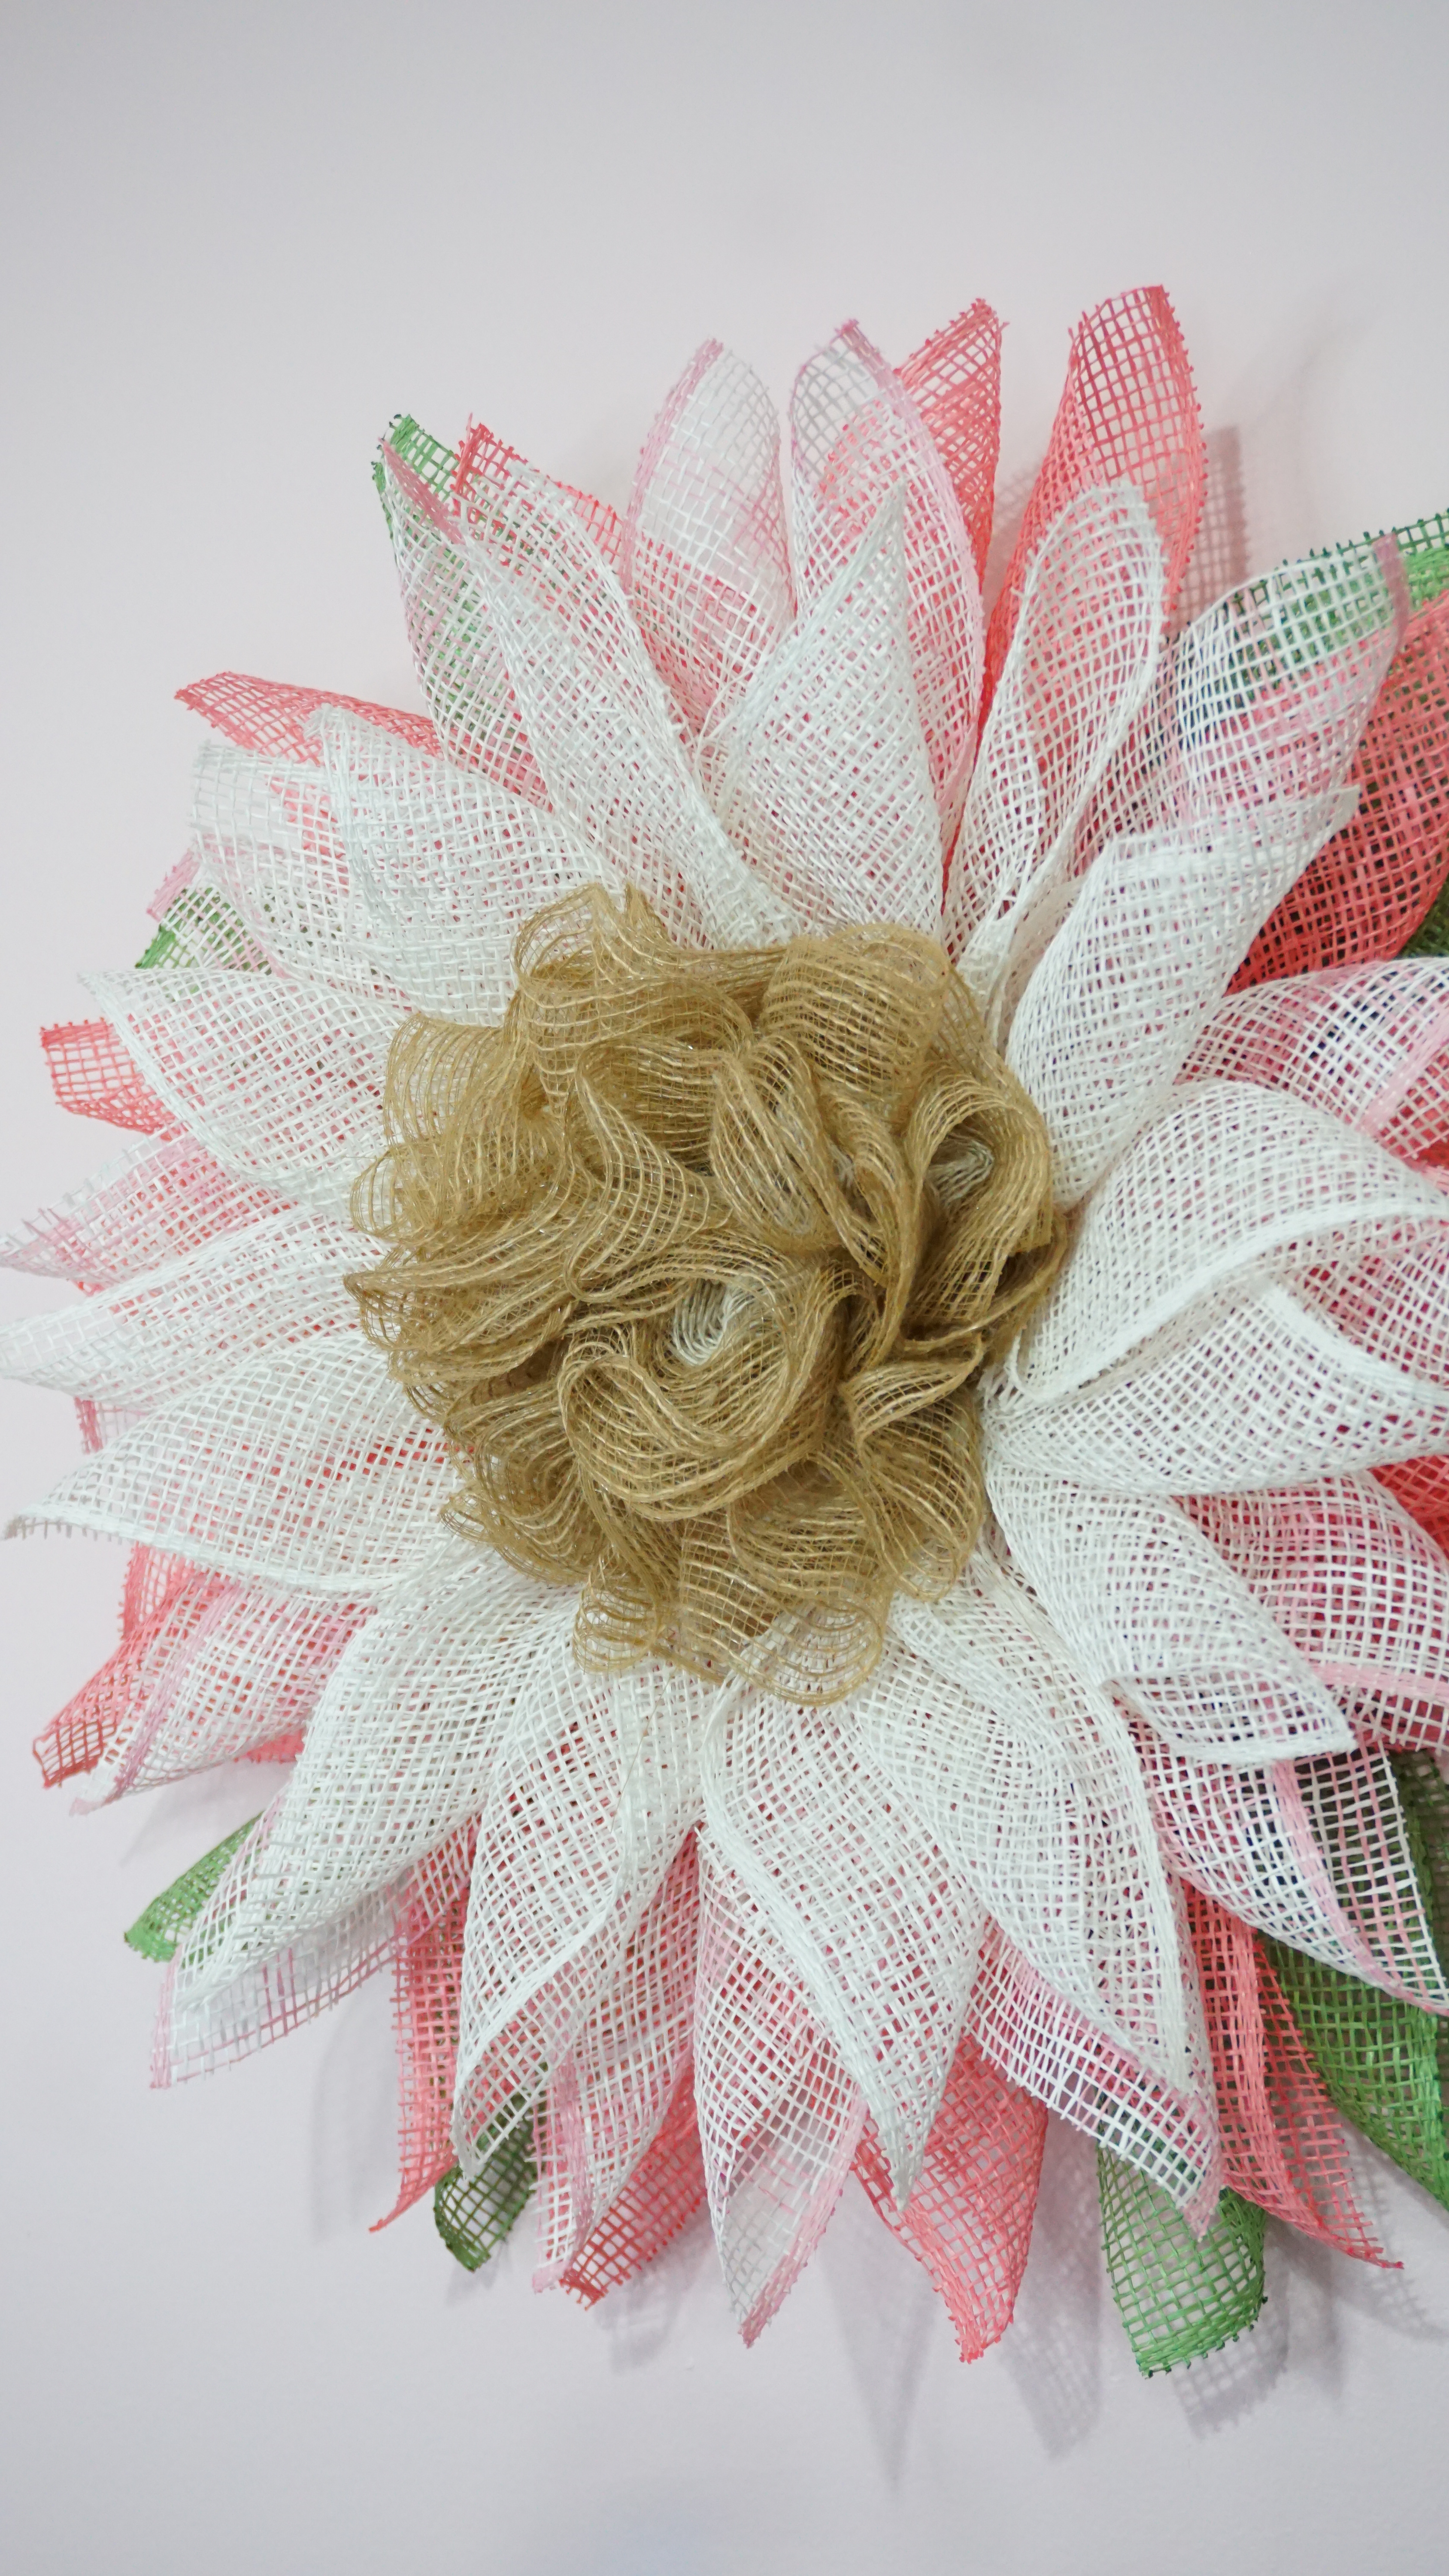
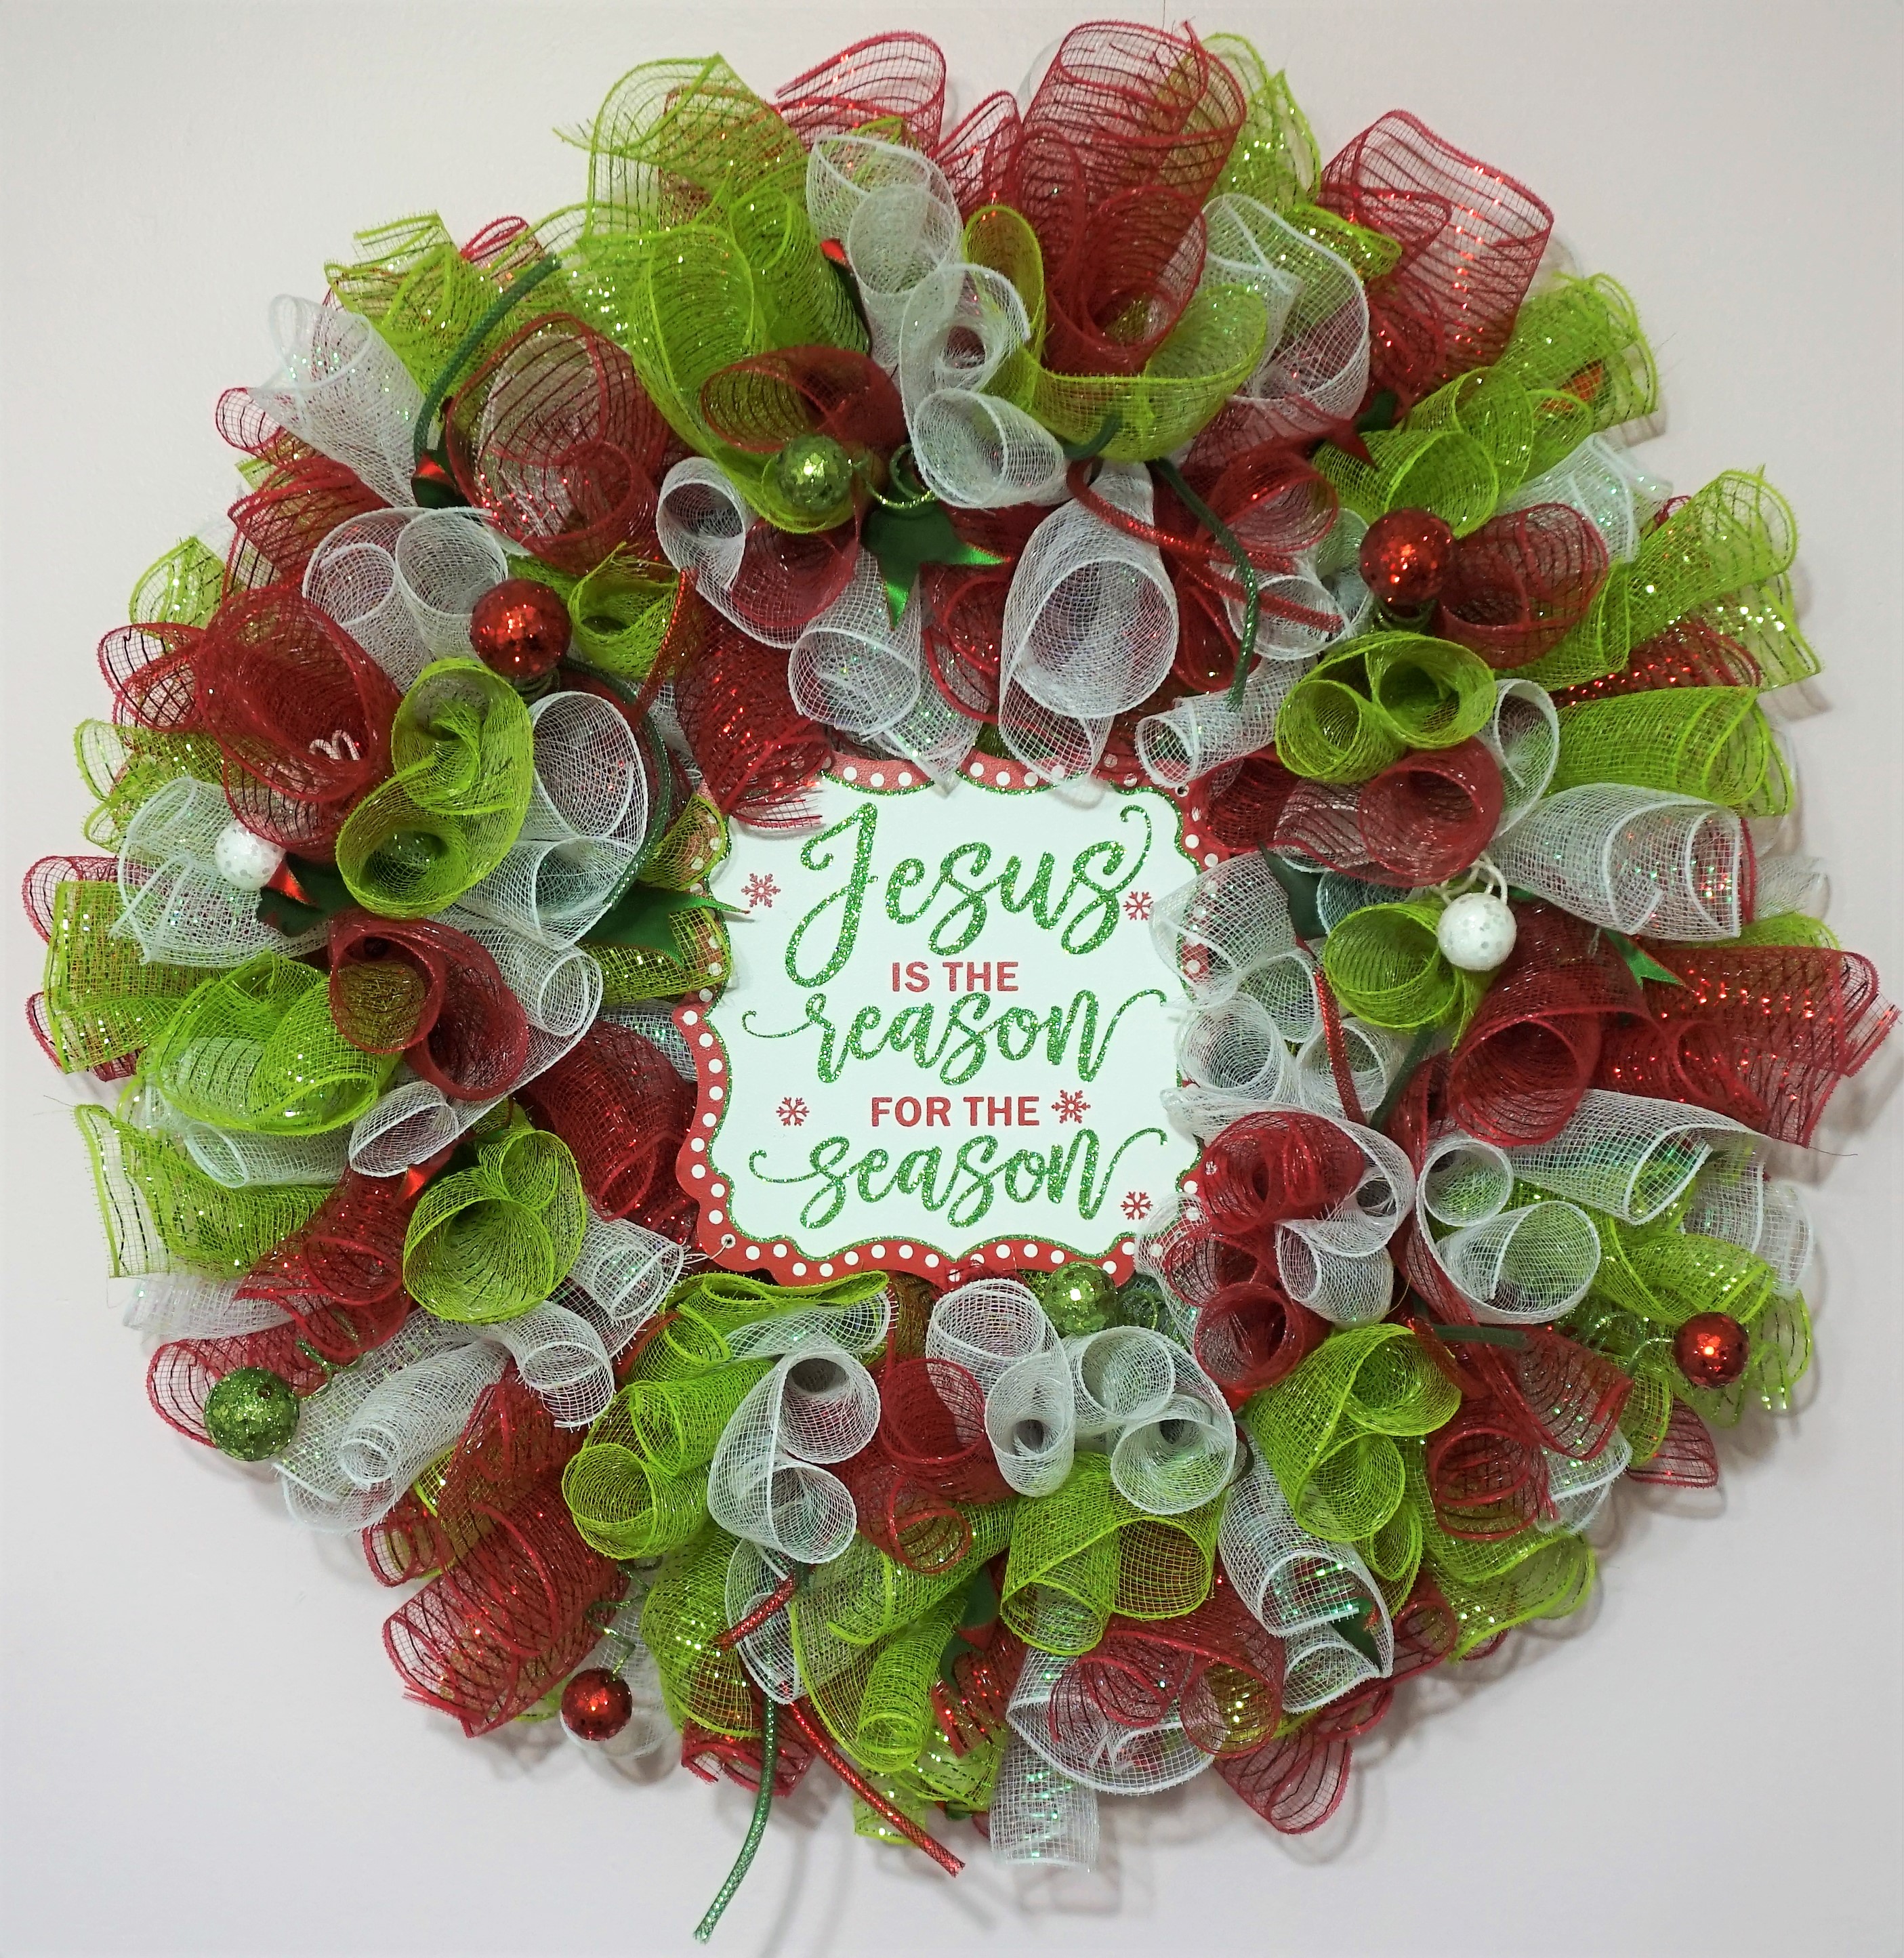
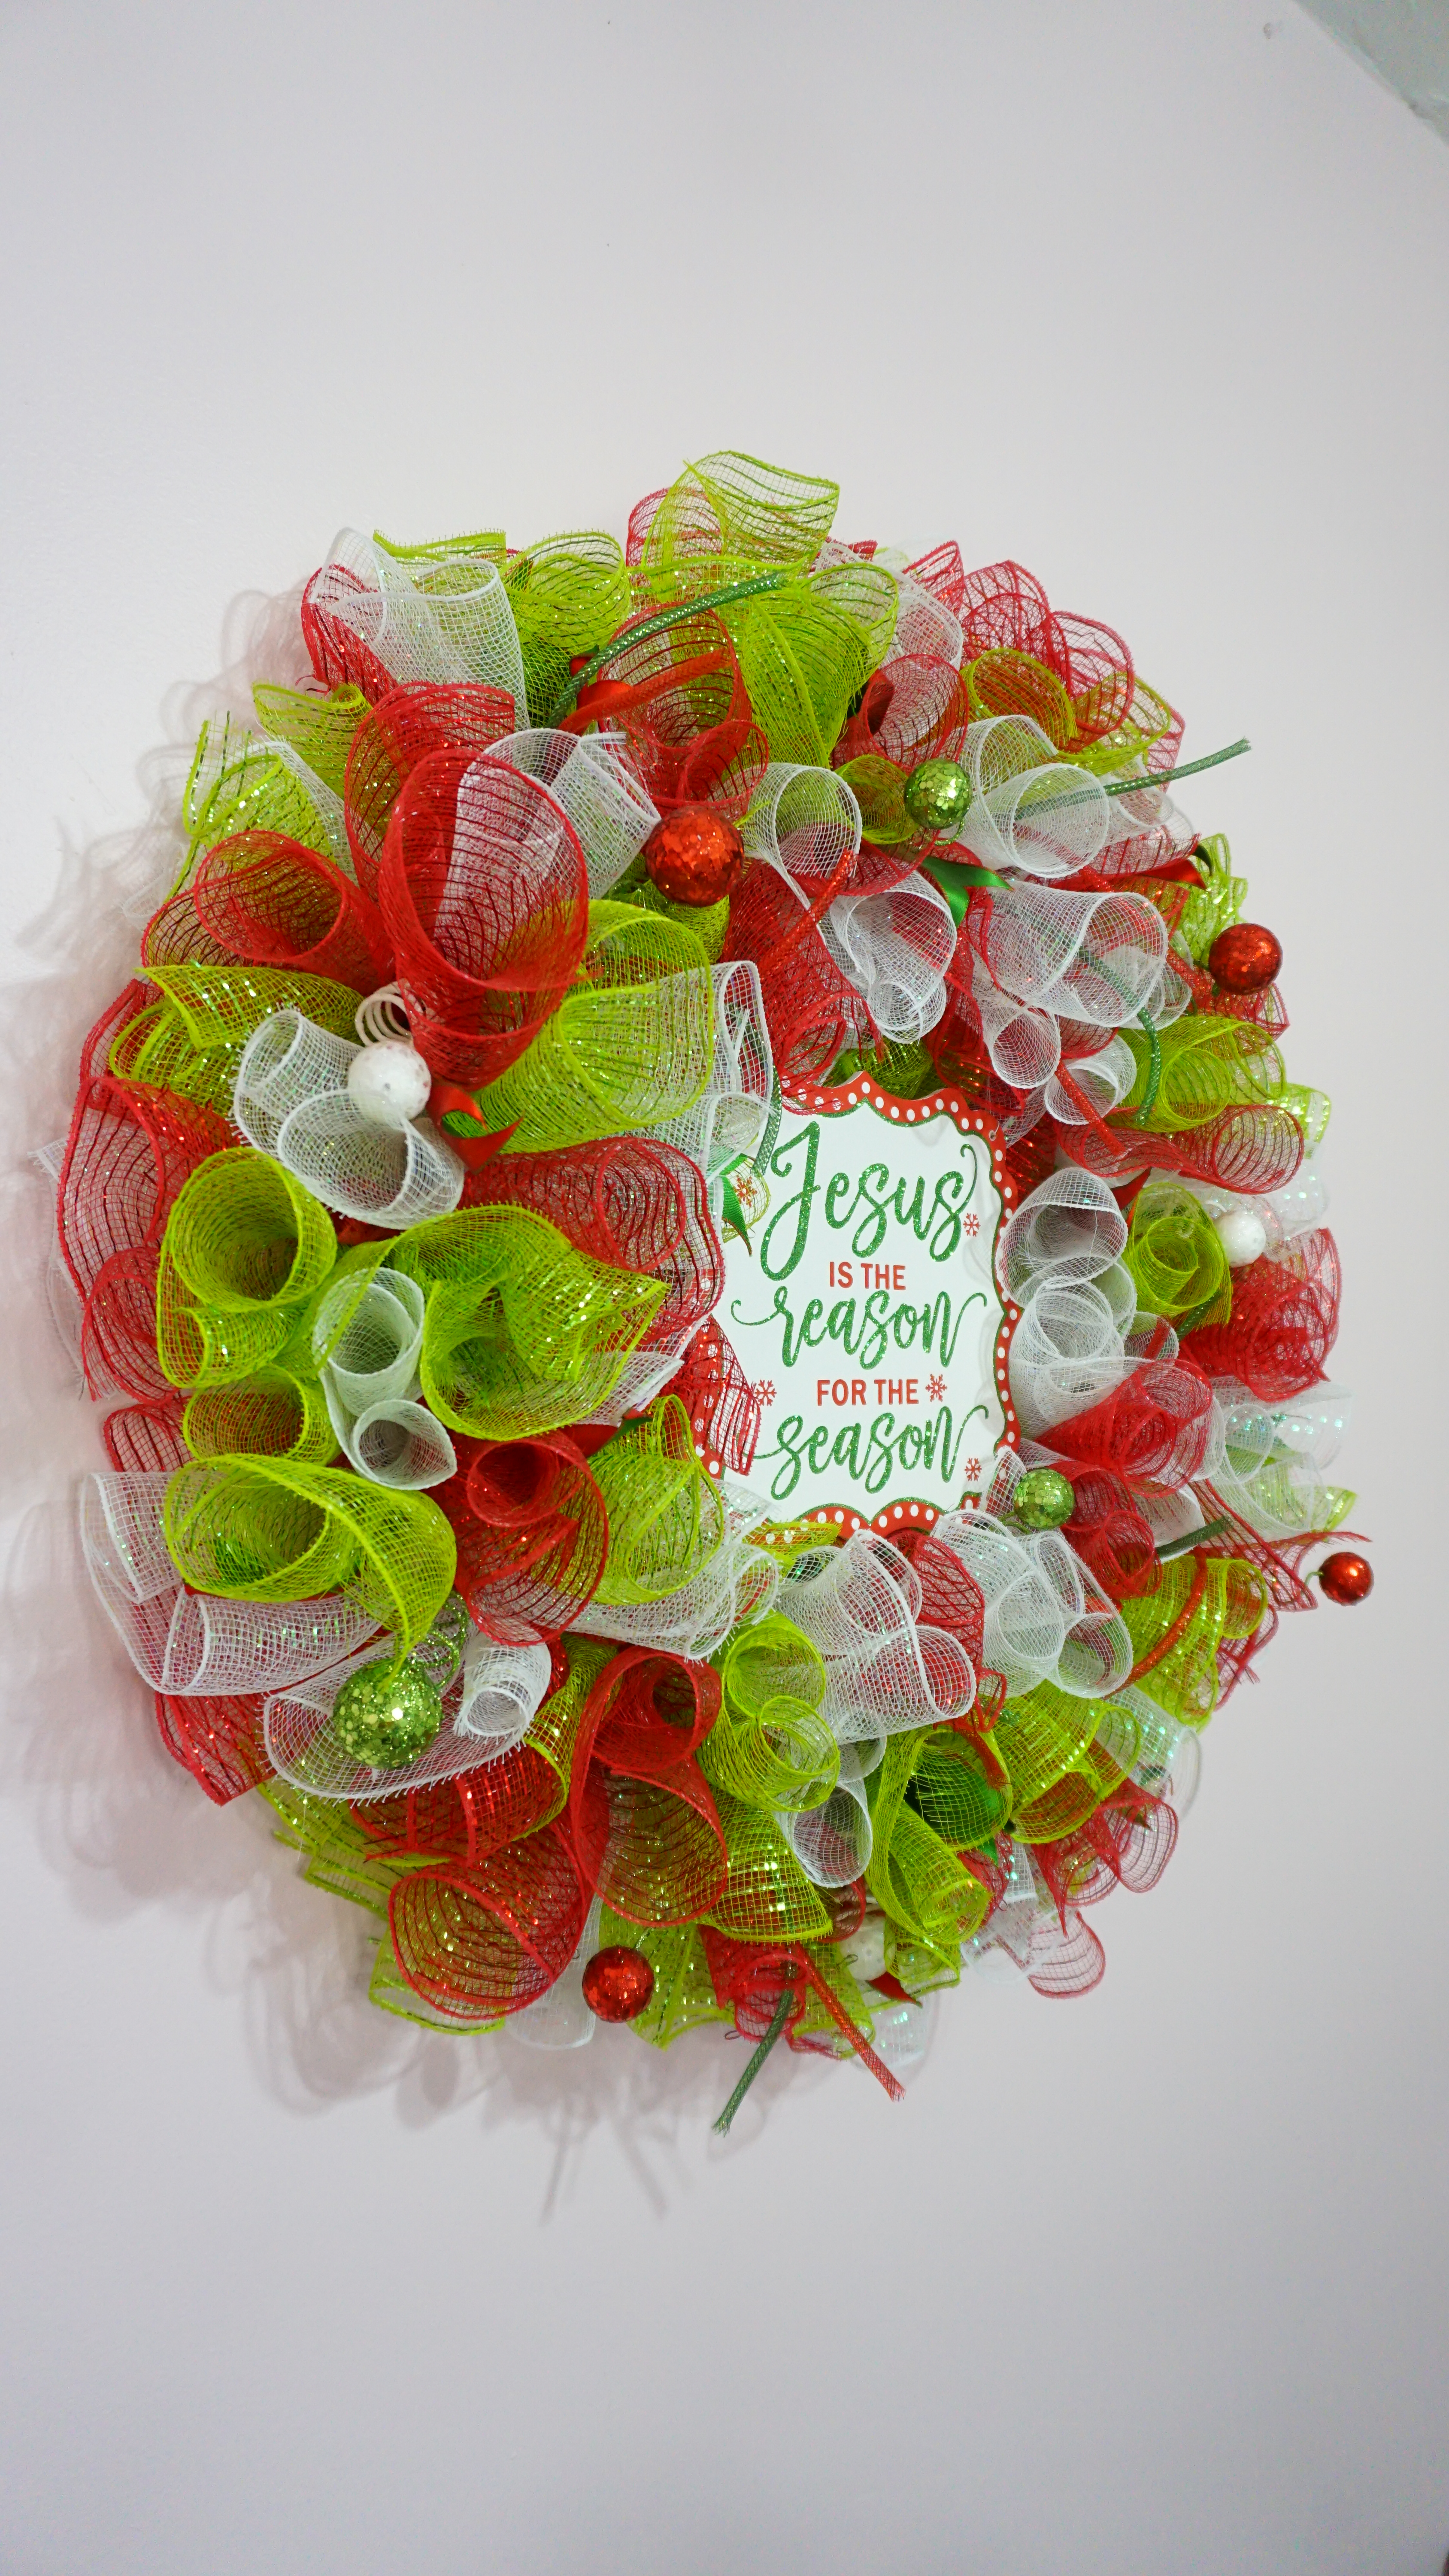
Below are some of the before and after’s. The new pictures are lighter and brighter, and the glitter on the Jesus is the Reason for the Season wreath finally POPS like it should!
But I have to say the wreath I had the most frustrating time photographing was the Merry Christmas Deco Mesh Wreath. No matter what I tried, and how much color correction I did afterwards, it either came out super dark or it looked washed out and was clearly given away by the sign in the middle (bottom right).
Now, the greens look green, the reds look red and the sign can stay its true colors, and it’s not even the main focus of this picture!
While the ring light does have 5 color temperatures and is dimmable, so far the whitest and brightest setting has worked the best for me…but I do like the other options in case I end up needing them later. With the new pictures, all I have to do now is simply straighten and crop. Definitely worth the investment, and while I already knew Kat was brilliant, this is just further proof that I should take any and all advice she is willing to share when it comes to marketing!